Building a walnut caddy can be a fun and rewarding project. Below, is a step-by-step tutorial to help you get started. Added bonus is a You Tube video of the full build.
First, you’ll need some basic woodworking tools.
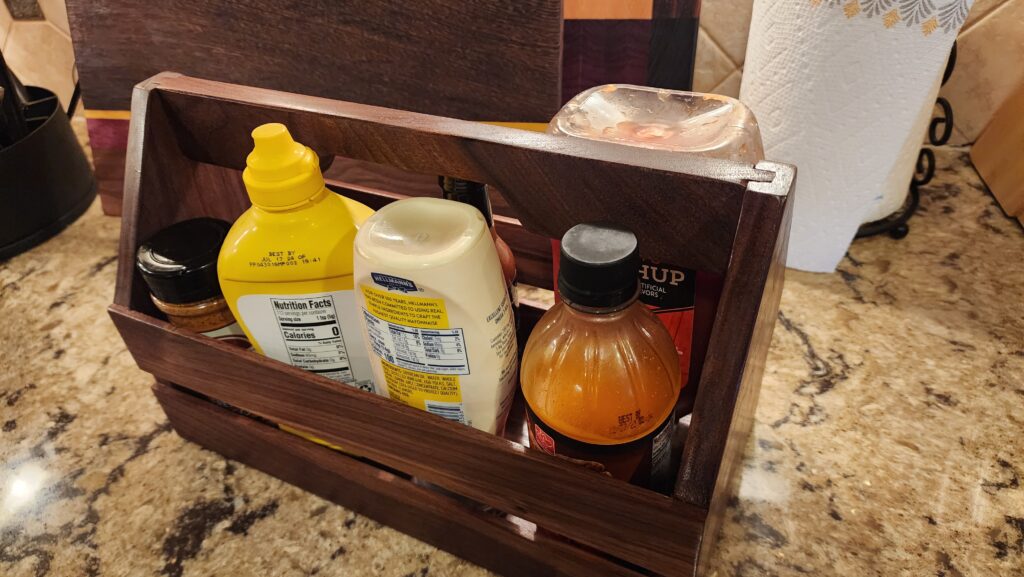
Looking for one already built? Just click the link below!
Best Equipment to Buy: (My top favorites)

DEWALT Thickness Planer, 13-inch:
- Three knife cutter head of the thickness planer delivers 30% longer knife life and makes knife change faster and easier
- Two-speed gear box of the wood planer allows users to change feed speed to optimizing cuts per inch at 96 or 179 CPI
- Fan-assisted chip ejection vacuums chip off of the cutter head and exhausts them out of the machine

WEN Band Saw with Stand, 10-Inch, 3.5-Amp, Two-Speed:
- 3.5 amp motor creates cuts up to six inches deep and 9-3/4 inches wide
- Uses 72-inch blades anywhere from 1/8 to 1/2 inches in size
- Spacious 14-1/8 x 12-1/2 inch cast aluminum work table bevels up to 45 degrees
- Operates at two speeds of either 1520 or 2620 FPM

DEWALT Random Orbit Sander, 5-Inch
- 3.0-amp motor of the orbital sander spins the pad at 8,000 – 12,000 OPM
- Shorter height of the hand sander allows the user to get closer to work piece
- Separate counterweight design reduces vibration for improved comfort of the electric sander
- Rubber over-mold in all of the critical areas of the sander
- Improved dust-sealed switch to protect against dust ingestion for longer switch life
Step 1: Choose your wood type.
You can find lumber at your local lumber store or purchase online. I have used Bell Forst and Rockler in the past. I’d have to say, my favorite was a company called Ocooch Hardwoods. Their website is easy to use and the selection they sent me was above my expectations. If just starting out, I recommend you purchase S4S lumber. Check out my you tube. channel if interested in making your own S4S lumber.
Once you have all your wood laid out. You will need some other basic tools and accessories.
Table saw
Clamps
Wood glue (Titebond II or III)
Hearing, and eye protection.
Dust mask or Dust collection.
Once the wood is your overall size, you will want to make sure the joints are completely parallel. Buying S4S lumber will make this an easier task. Clamp up your board and leave sitting for 24 hours. Try to keep it as flat as possible. You can use “cauls” for this. Scrape off any excess glue and send it through the planer. You have done the hard part, now its on to step 2.
Tools and Accessories:

24 inch Parallel Clamps:
- Application: using a deep 3-3/4” throat depth for optimized pressure distribution and a powerful clamping force of over 1,100lbs, these parallel jaw bar clamps will make your woodworking, furniture and table top glue-ups much easier
- Premium design: Each clamp features an ergonomic soft grip handle, cold Steel rail, three removable jaw pads that are non-marring and possess Rapid action movement, and an easily convertible Clamp spreader tool
- 90 Degree angle: Clamp provides high precision clamping at 90 Degree angles, keeping your material and work pieces square and free from movement
- Versatility: Whether your project requires evenly applied clamping pressure, A secure locking system, or even the use of a quick bar clamp spreader – You’ll have a firm grip of it all with this convenient tool

Hearing Protection:
- BLOCK NOISE: heat-activated memory foam eartips expand like earplugs to significantly reduce outside noise. ANSI-certified and OSHA-compliant with a 22 dB Noise Reduction Rating (NRR) and 85 dB SafeMax Volume Limiter. Comes with 3 pairs of foam eartips (S,M,L) and 3 pairs of silicone double-flange eartips.
- TRUE WIRELESS: ISOtunes FREE introduces a cordless solution for your workshop, jobsite, and home. Remove sweaty cords and muffs for increased versatility and comfort. Utilizes latest Bluetooth 5.0 technology with easy-to-use automatic pairing to your devices.
- ALL DAY BATTERY: 7+ hour battery life gets you through long days without having to recharge. Minimize recharging hassle with our compact, portable charging case capable of 3 full charges for 21 hours of extra use. Expanding foam eartips and thoughtfully designed earbuds hold comfortably and securely all day.
- CLEAR CALLS IN LOUD ENVIRONMENTS: Signature noise suppressing microphone with echo cancellation technology help block steady state noise like engines, mowers, fans, vacuums, and saws for clear calls in loud environments. Isolation for you, cancellation for them.

Titebrond III Glue: (waterproof)
- Passes ANSI/HPVA type I water resistance
- waterproof formula that cleans up with water
- Superior strength – strong initial tack
- Longer open assembly time
- Lower application temperature
Step 2 : Cut width on table saw
The width I chose here was 6 inch. Material thickness was 3/4 inch.
Step 3 : Cut lengths on the miter saw.
Cut 2 sides at 8.5 inch tall. One bottom at 13 inch, one
Step 3 : Make Handles
Check out my You tube video.
Step 4: Sand and clean
- Start with a low-grit sandpaper (maximum 80 to 120 grit)
- Sand the entire surface of your board with an orbital sander to remove any rough grain and soften the edges of the board.
- Using an air compressor, blow off any dust. Repeat the entire sequence through abrasives (120, 150, 180, 220, and finally 320).
- Once the wood is smooth wipe down using a tack cloth.

About this item
- Osmo Polyx-Oil is a professional, Satin-Matte floor finish of particular durability and resistance for interior solid wood floors, cork, wood trim and panel goods.
- Meets wood’s natural demands; Micro-porous, water-repellent, dirt and wear resistant.
In conclusion, building a walnut caddy can be a fun and rewarding project. With some basic woodworking tools and materials, you can create a beautiful and functional caddy for your next BBQ. This is a one weekend project. So why not give it a try and and impress your friends at your next cookout?